The project is shared on Github as AdventureGameMk1.
Project details
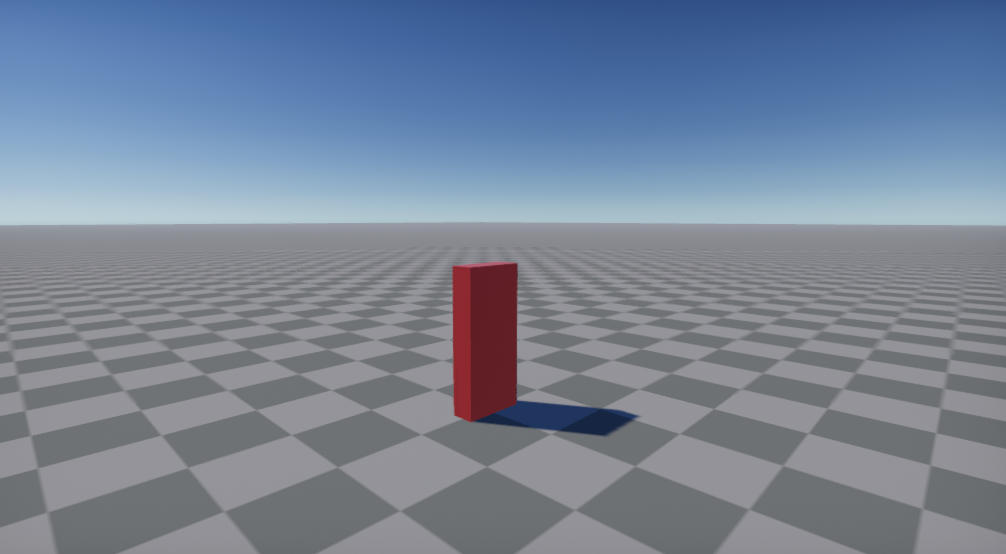
The project provides ability to move a Player placeholder box across the surface of a large chequered plane, and provides a camera that follows the player.
Controls
| Left-click ground | Moves the player |
| Hold right-click | Orbit camera around player |
| Scroll-wheel | Camera zoom |
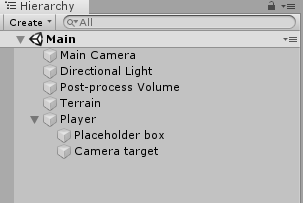
Project hierarchy
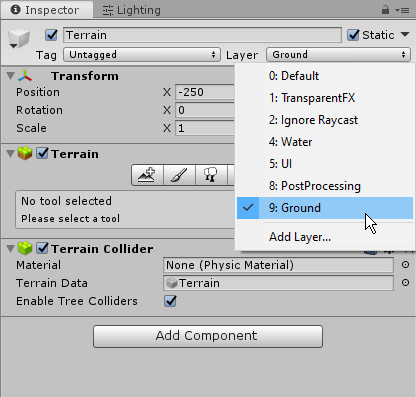
Terrain
The Terrain is the Unity default terrain, I resized it to 500×500 and set its position to (x,y,z) = (-250,0,-250). The terrain therefore lies in the y=0 plane and is centered on the World origin (0,0,0). The default texture is a checker pattern where each square is 1x1m.
The terrain has a Terrain Collider attached to it which allows for interaction with mouse-clicks and is needed for the Player navigation. To enable the PlayerController.cs script to recognise the Terrain as a walkable target it is assigned to the Ground layer.
Player character
Player
This parent empty holds the other objects. It has Nav Mesh Agent component attached to it to enable navigation.
Placeholder box
The red box is acting as a placeholder for a player character. It is made from the default cube scaled to about the size of a person (1.8m tall, 0.8m shoulder-width).
Camera target
Is used as the pivot point of the camera. It is an empty object placed 1.6m above the player’s feet. It is assigned to the CameraController.cs script in the Main Camera.
The player navigation is done with the PlayerController.cs script using ray-casting (on mouse left-click) to determine the point to move to. The rays interact with objects assigned to the Ground layer (shown above). The target locations are passed to the Nav Mesh Agent, which causes the player to move.
Main camera
Field of view             60
Far Clipping Plane        1000
With the LWRP template (see below) many of the camera settings are specified as Use Pipeline Settings.
The script CameraController.cs provides orbiting around the player by holding right mouse button, and zooming with mouse scroll.
Directional light
The type of light is directional which emulates the type of light the sun provides
Intensity 0.8
Lighting Settings
Under Window > Rendering > Lighting Settings
Fog              enabled
Mode             Exponential squared
Density          0.01 (noticeable on the horizon)
Lightmap generation
Under Debug settings
Auto generate enabled
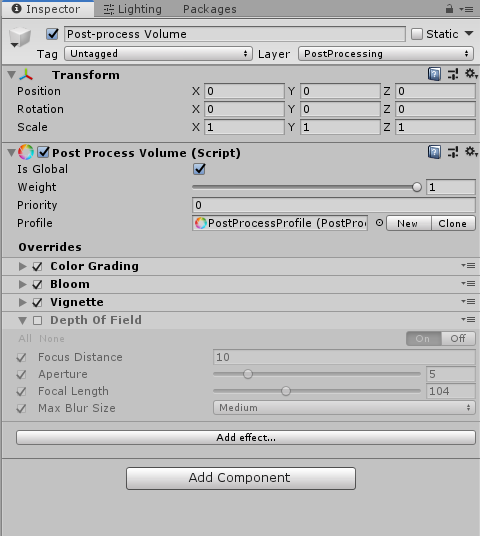
Post process volume
Is used for lighting and rendering effects, it can be used to add various post-rendering effects to the scene. The effects are listed in the inspector of the Post-process volume. The Post Process Volume checkmark can be toggled to see the difference in lighting with or without the post-processing applied.
Lightweight Rendering Pipeline
The project is created in Unity 2019.2.13f1 and uses the Lightweight Rendering Pipeline (LWRP) Template
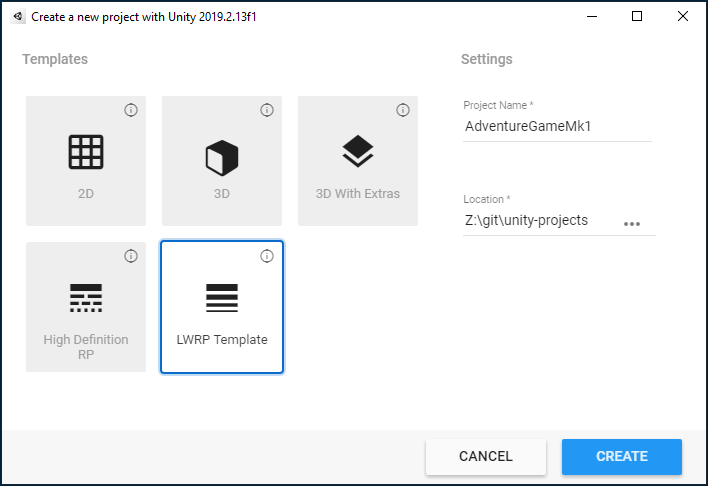
I decided to start this project based on the LWRP template because it’s lightweight and will save processing time. Performance improvements are probably at the cost of visual effects, but I don’t know exactly what these are yet (and haven’t noticed any difference). Earlier when working on large terrains, rendering them would exhaust the processing power of my machine. I can say from observations that the rendering speeds based on the LWRP seem to be many times faster (perhaps 10x faster).
The information associated with the LWRP Template states that it comes with the Lightweight Rendering Pipeline, Shadergraph, Post processing V2 stack and Presets. This corresponds to installed packages under Windows > Packet manager. The following are seen to come with the LWRP template (these are not installed with the default template when using the built-in renderer)
| Installed version | |
| Lightweight Rendering Pipeline | 6.9.0 |
| Shadergraph | 6.9.0 |
| Post processing V2 Stack | 2.1.6 |
Github
AdventureGameMk1
https://github.com/ultimate-real/AdventureGameMk1
.gitignore
The .gitignore used is the Unity template supplied by Github.com.
[Ll]ogs/