Our group has been creating an increasing number of 3D models in Blender. We usually want to share them between ourselves and with a broader community. For now, we have been exchanging these files through e-mail or other messaging systems, as well as having @robhoff uploading them here on our web page.
These options have their advantages and disadvantages, but they all have a great caveat: someone needs to spend extra time managing the growing collection. It can be very time-consuming to curate the models, write down some minimum metadata, verify that these were exported correctly, check textures, keep track of authorship and licensing, or even manage any complications related to file management.
Sketchfab (and similar web pages) offer a specialised system that minimise the time spent in most of these tasks so that the same artist can do them in a couple of minutes. It might also be a great source of personal motivation and self-promotion for both professional and amateur 3D artists. You can use Sketchfab to build a public portfolio while you learn and improve your skills. It is a great place to connect with a community of modellers, get feedback, and inspiration from other people’s work.
The most attractive feature is, by far, that you can share cool interactive visualisations of your models — if not for something else, at least to brag to friends and family! Besides sharing the link, you can also get the HTML code for embedding the Sketchfab interactive display on your own web page (like I did above).
Ok, I probably sold it, no?
Well, then, it becomes a problem of how to set up your workflow from Blender to Sketchfab. Easy enough. They have a great help section you can consult. Yes, but, as in anything related to digital technology, “easy” is a matter of perspective!
So I decided to make a short tutorial to explain exactly, step-by-step, how to do it (or at least how I did it).
Step 0: some terms and conditions
I’m assuming as a starting point that you’re interested in publishing 3D models in Sketchfab. So the first thing you should consider is if you actually want to do it under their terms and conditions.
A free individual account in Sketchfab will allow you to upload an unlimited amount of models, but only if these are made public and released under an open-access license. This latter condition means that people will be able to download and re-use your model. Typically, you’ll choose CC BY Attribution if your only concern is recognition, but you may want a more restrictive license depending on the nature of the work and the potential uses it may have.
If you want some models to be displayed but not downloadable (or on sale), but don’t consider it’s worth for you to have a paid account, you’ll only be able to upload such models once per month. Another important restriction for uploading models using the free account is the maximum file size: 50MB.
Still, pretty good if what you want is to show people your work!
Step 1: Open an account and set up a profile
Once you committed to the idea, you’ll need to go to sketchfab.com and sign up. Choose a good memorable user name, but not too long or complicated because that will be the subdomain of your profile portfolio. In your profile, you’ll have the opportunity to use a different “display name” and add more details. You may also link the account to Google, Facebook, or Twitter (if you dare!).
Step 2: Blender and model ready to go
Next, check that you have a working version of Blender installed (preferably the latest one). Sketchfab does accept file formats created with other software, but I’m limiting this tutorial to Blender (.blend extension).
To test that you are able to upload a model to Sketchfab, you’ll need to have an original model that you consider “finished” and is willing to share. There is no quality control to upload public downloadable models, so don’t be shy!
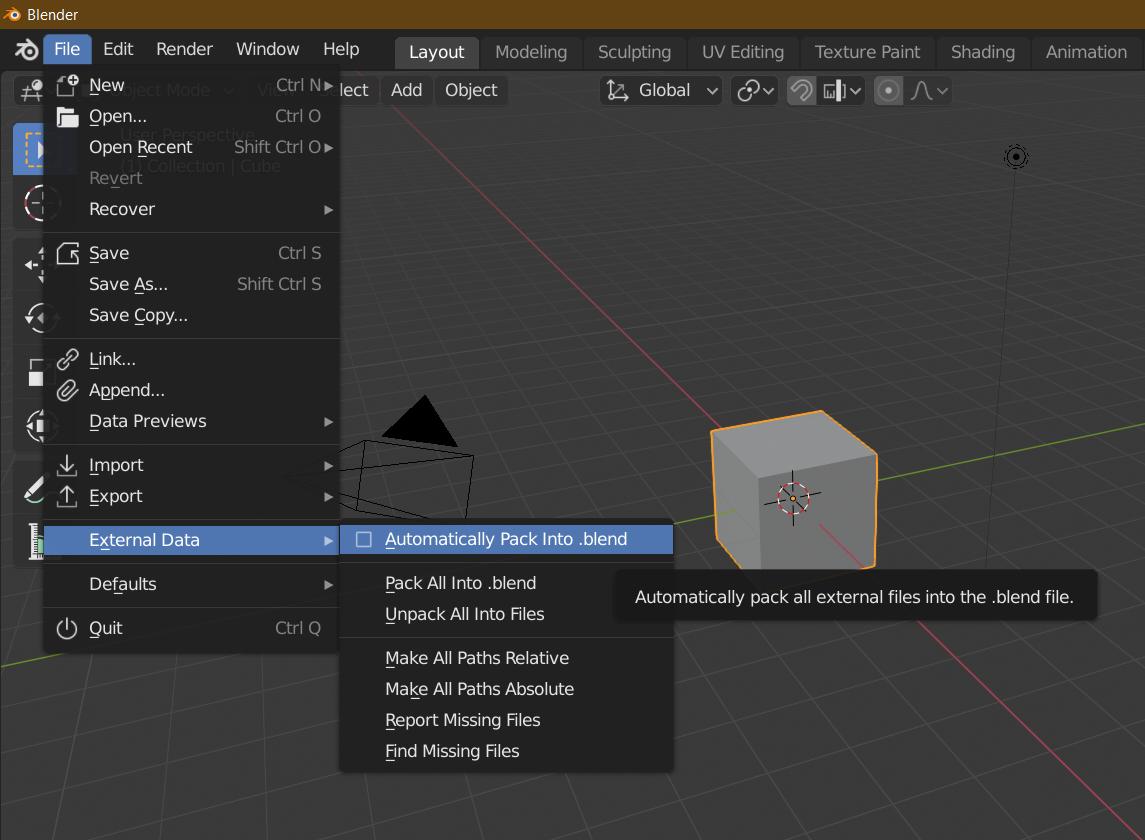
An important aspect to remember when uploading a model from Blender is to check that any textures used in the model are packed into the blend file. To do this, you must open the model in Blender, go to “File” > “External Data”, and check the option “Automatically Pack Into .blend”. Remember to save it afterward.
Step 3a: Direct upload
Sketchfab interface is quite straightforward and you can, at this point, take the “easy way out” by uploading the model directly onto their web page. To upload a model, you can simply click on the upload button (top-right, near your profile image) and drag & drop or browse your model file.
If you are happy with this option, skip to step 4.
Step 3b: Download, Install, and use the Blender exporter
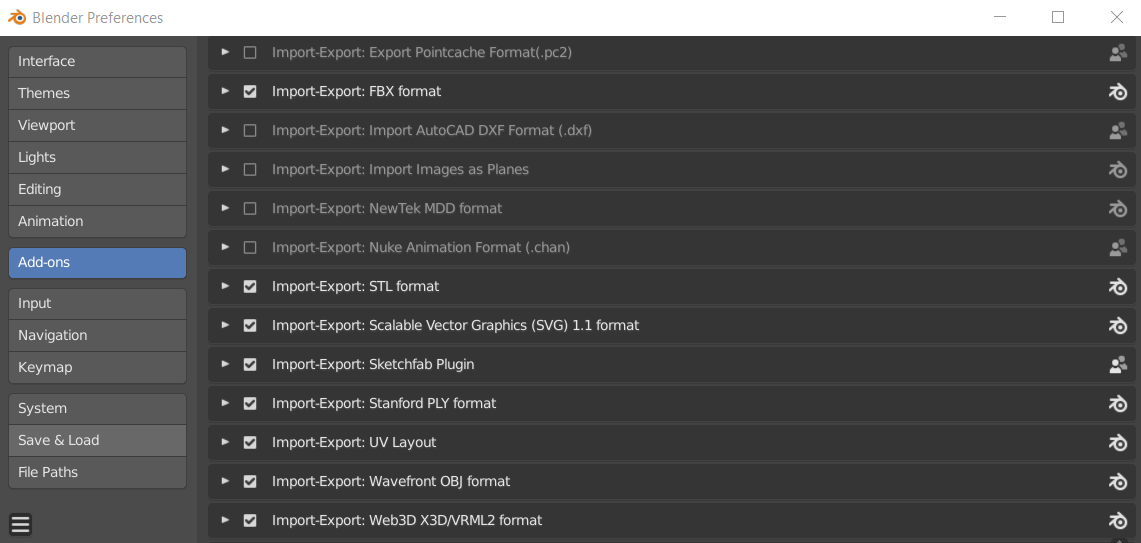
Sketchfab offers a second option for uploading models from inside Blender by using a Blender add-on. Following the instructions in this link, download the latest release (a .zip file) and install it as any other Blender add-on: go to “Edit” > “Preferences” > “Add-ons” > “Install…” and select the file. Remember to check the add-on in the list after the installation is finished.
Once this add-on is installed and active, you’ll see a new lateral tab named “Sketchfab“.
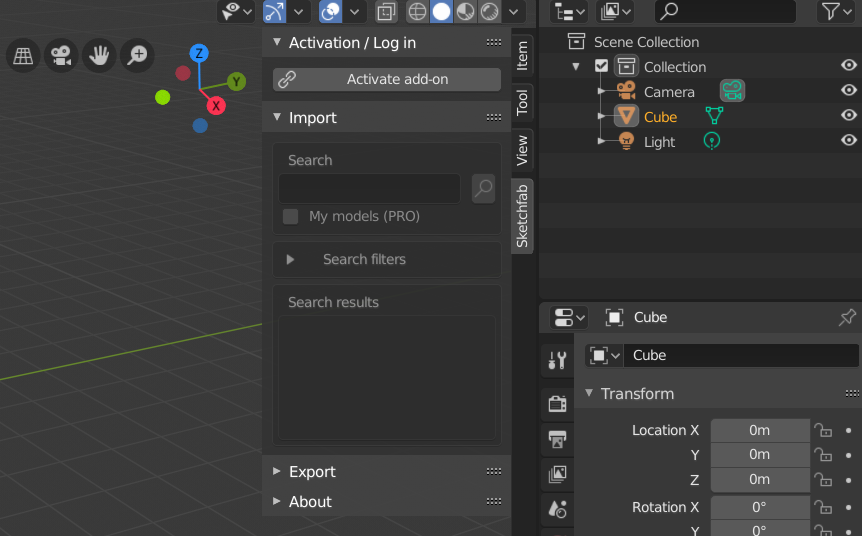
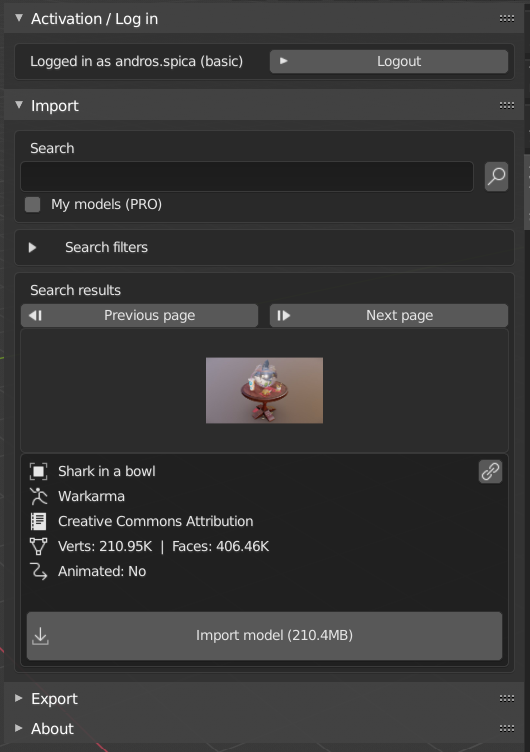
Click on “Activate add-on” and enter your registered e-mail and password. You’ll get the confirmation by having your username displayed (apparently, I’m basic!). Also, you’ll get a random model from the Sketchfab database shown as a search result, inside the “Import” section. That’s right here a good reason of why getting this add-on: you can search and import models from inside Blender too!
Close the “Import” section and open “Export“. Here you can enter the main metadata related to your model: title, description, and tags. Only the title is strictly required. I personally recommend you to keep “Draft” checked so that the model will not be published right away. You can then fill out the tags in the web page using the autocomplete feature, which suggests tags that are already being used. You can also check “Private” and spend your single free upload per month.
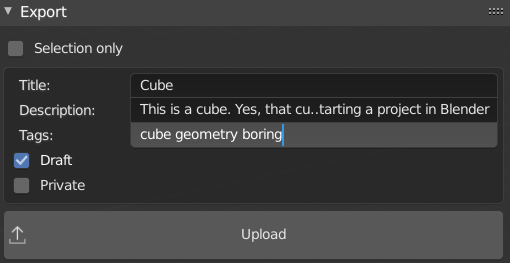
Note that you can check “Selection only” and export only the part of you current scene that you selected. In my opinion, this might not be a good option if you plan to update your model at some point, because you’ll need to repeat the same selection every time.
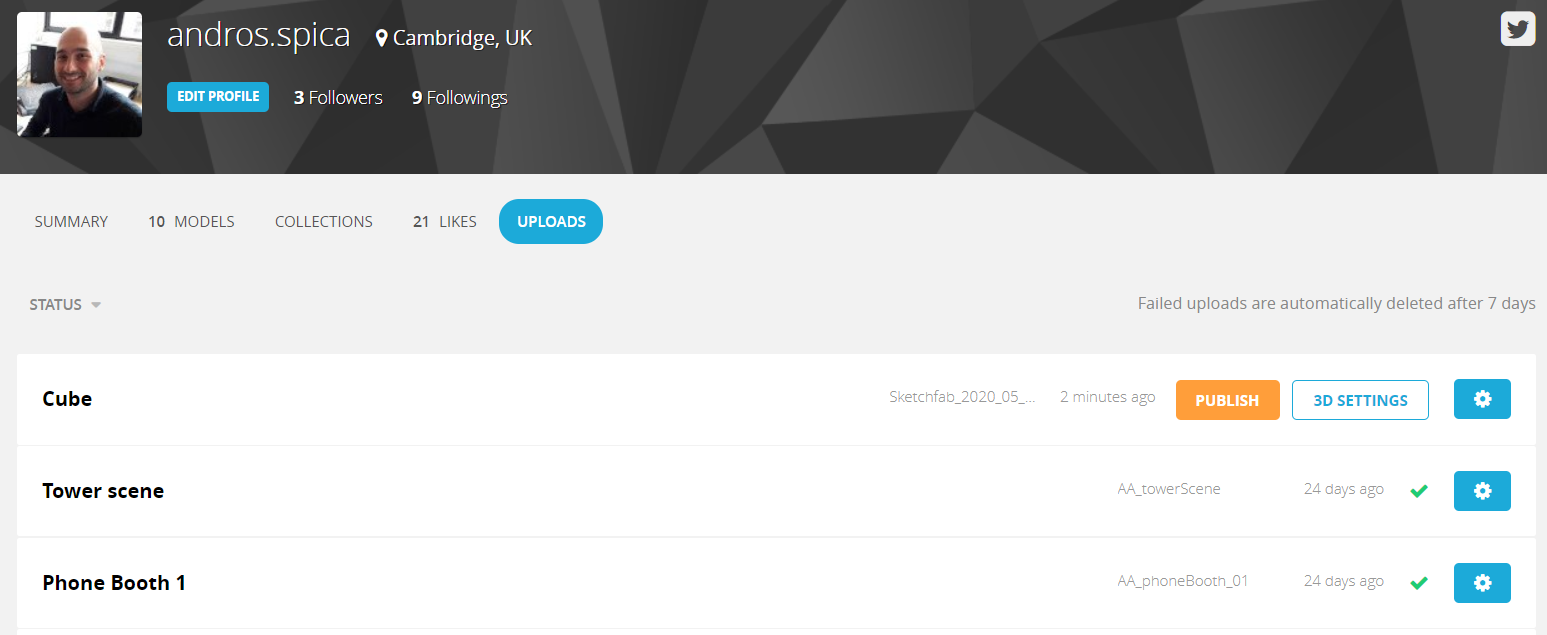
Click on “Upload”, wait until it’s over, and check your model library online to see the result (note that, at first, you might find the draft in “Uploads” not in “Models”).
Read their instructions in the add-on repository, in case you have any problems.
Step 4: Polishing the metadata
Assuming you uploaded the model as a draft, click on the model title, and then “Edit properties“.
You’ll see the “Edit model” window where you can enter or modify all metadata about your model, including the title.
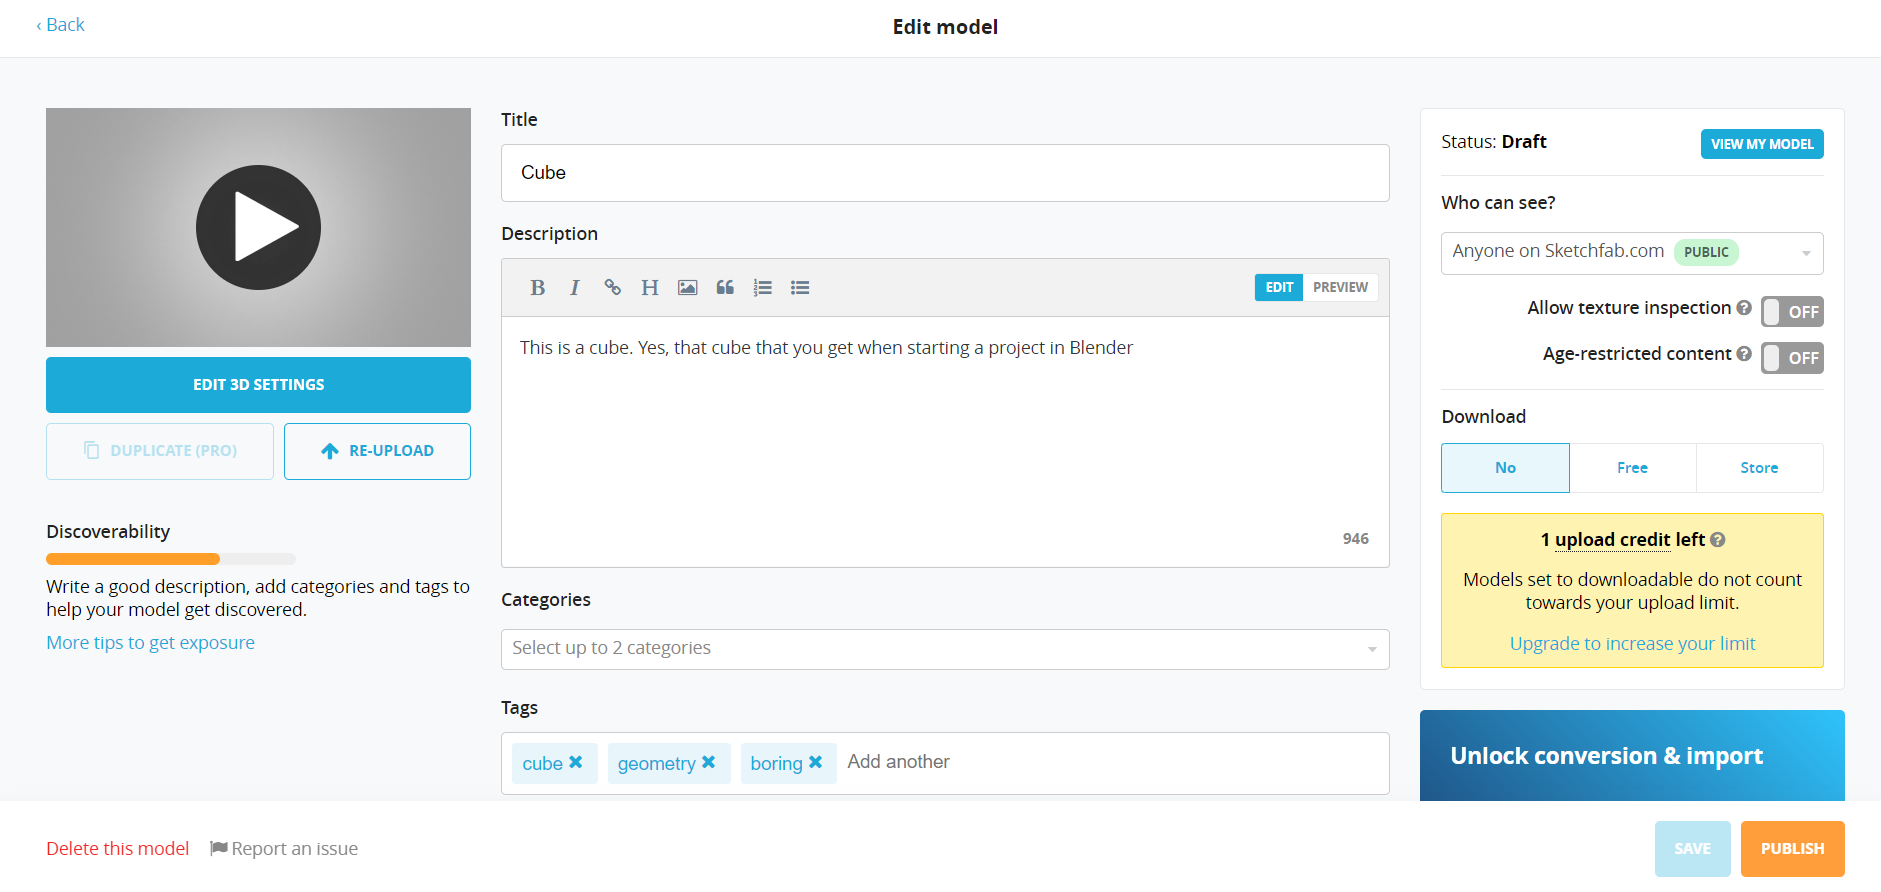
In this window, you have the option of re-uploading your model file (below the display view on the left) or delete it altogether (bottom left), which as far I know cannot be done with the Blender exporter. You also have a colour-coded metre showing the discoverability of your model according to the metadata (the more you add, the better).
Most options are self-explanatory. However, it is worth noticing that, before you publish it, you can set up the level of access and the license of your model (right side). If you want to make it public and open access, you must remember to go to “Download” and click on “Free”, which will update the options and allow you to choose a license (default is CC Attribution).

At the bottom left, you can save the draft and come back to it later, or you can publish it.
Step 5: Share it!
Once you click on “Publish”, you’ll be ready to start sharing your model!
Open your model in Sketchfab and click on either “Share” or “Embed”, just below the interactive display.
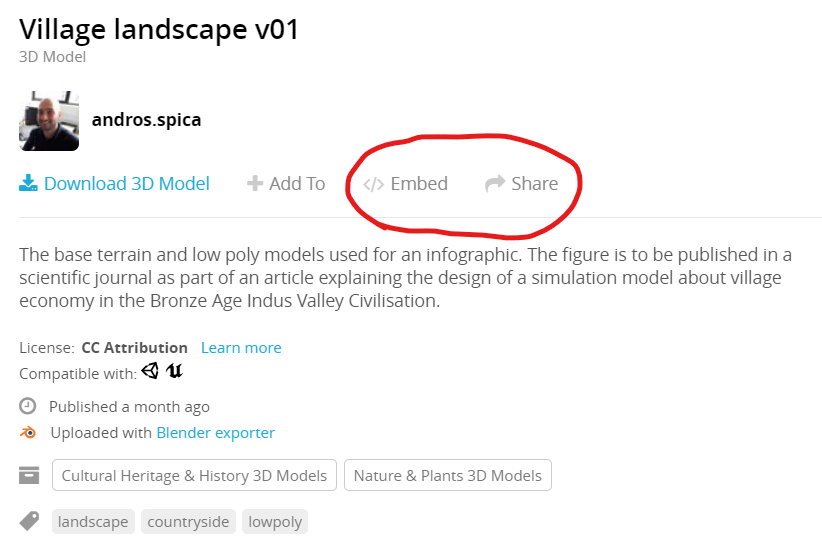
“Share” will allow you to either copy the link to the model or post it directly on a social media platform, like Facebook or Twitter.
“Embed” offers you the option of copying a piece of HTML code that you can use in your web page to display the model using Sketchfab interactive viewer (like I showed before!). Just click on the textbox with the code and it will be copied automatically to your clipboard.
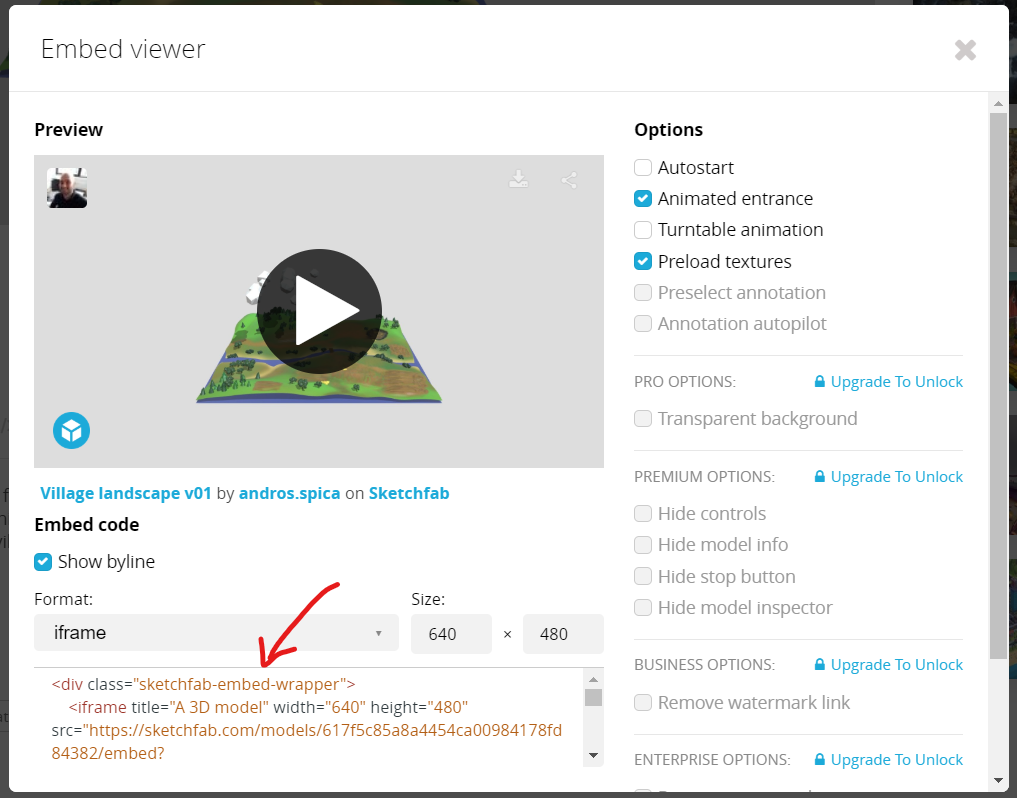
To use it in WordPress, for example, set a block of type “HTML” and paste the code inside it. If you’re not the administrator of the site, you might not be able to use iframe. There’s a work around that using a shortcode instead. Here, for example, I’m using the following:
[sketchfab-embed model="https://sketchfab.com/3d-models/village-landscape-v01-617f5c85a8a4454ca00984178fd84382" width="640"]Ta-da!!!